Google Pay Integration
Prerequisites
Google Pay™ requirement
- Your App is published
- Complete your Business profile
- Share your Google Merchant ID with us to configure in our system.
Device and Account Setup
- Physical device running Android 9+.
- Google Account logged in with a valid payment method in Google Wallet.
- Note: The emulator support for Google Pay is limited; physical devices are recommended.
- Valid payment method is added to Google Wallet
Manifest Configuration
You must enable the Google Wallet API in your AndroidManifest.xml.
<application>
...
<meta-data
android:name="com.google.android.gms.wallet.api.enabled"
android:value="true" />
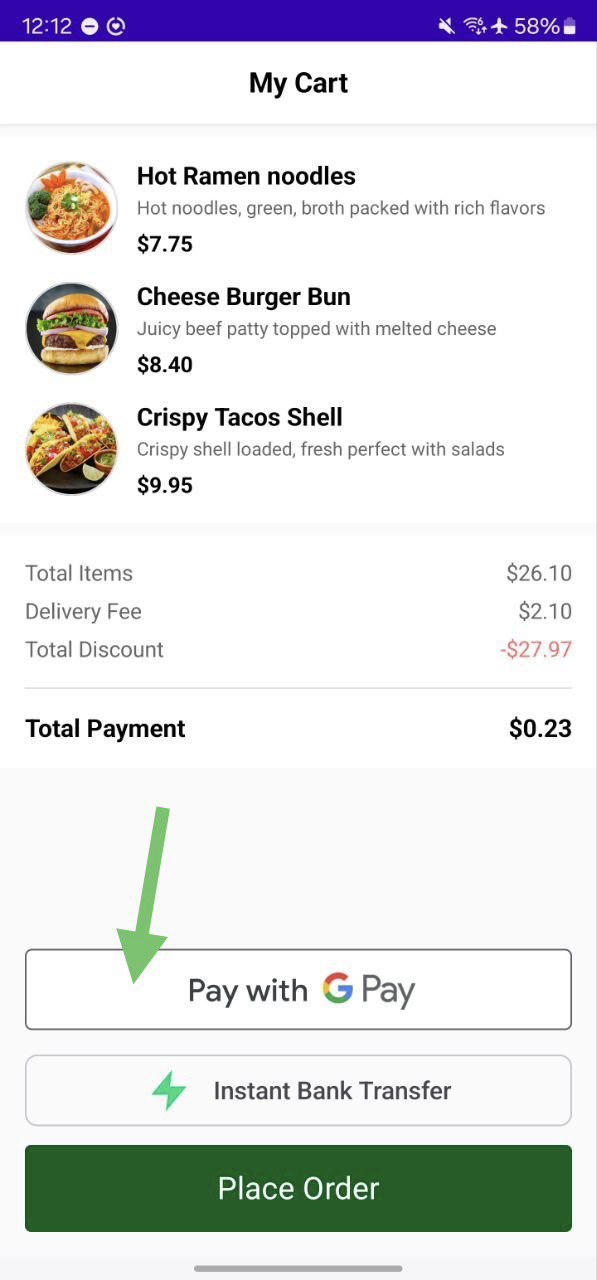
</application>UI Implementation (Jetpack Compose)
Use the PayablGooglePayButton composable. This button handles the availability check, session loading, and payment flow.
@Composable
fun PaymentScreen() {
    PayablGooglePayButton(
        modifier = Modifier
            .fillMaxWidth()
            .height(56.dp),
        buttonType = ButtonType.Pay, // Options: Pay, Buy, Checkout
        environment = PBLEnvironment.SANDBOX, // Switch to PRODUCTION for live apps
        // 1. Check availability
        onGooglePayAvailability = { isAvailable ->
            Log.d("GooglePay", "Available: $isAvailable")
        },
        // 2. Provide Session (Lazy Loading)
        sessionProvider = {
            fetchSessionConfiguration()
        },
        // 3. Handle Result
        onPaymentResult = { result ->
            handlePaymentResult(result)
        }
    )
}
Configuration Parameters
The PayablGooglePayButton component accepts the following parameters:
| Parameter | Type | Default | Description |
|---|---|---|---|
buttonType | ButtonType | ButtonType.Pay | Type of button (Pay, Buy, Checkout, etc.) |
theme | ButtonTheme? | null | Button theme (Light/Dark); auto-detects system theme if null |
radius | Dp | 100.dp | Corner radius of the button |
environment | PBLEnvironment | PBLEnvironment.SANDBOX | Environment for availability checking |
onGooglePayAvailability | (Boolean) -> Unit | Callback invoked when availability is determined true → Google Pay available to pay false → Google Pay not available to pay | |
onPaymentResult | (GooglePayButtonResult) -> Unit | Required | Callback for payment results |
sessionProvider | suspend () -> PBLConfiguration | Required | Suspend function that provides session configuration |
Session Provider Implementation
The sessionProvider is a suspend function that executes only when the user clicks the Google Pay button. This lazy initialization approach optimises performance by deferring expensive operations until necessary.
Example
private suspend fun fetchSessionConfiguration(): PBLConfiguration {
return withContext(Dispatchers.IO) {
// 1. Call your backend to init payment
val response = apiClient.initPayment()
// 2. Handle network errors
response.getOrElse { exception ->
throw exception
}
// 3. Map backend response to SDK Configuration
PBLConfiguration(
sessionId = response.sessionId,
ephemeralKey = response.ephemeralKey,
userId = "user_id_from_app",
environment = PBLEnvironment.SANDBOX
)
}
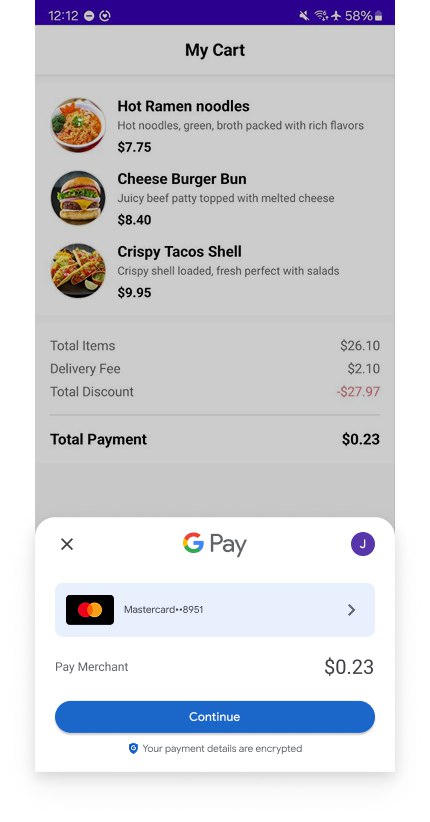
}Payment Result Handling
The PayablGooglePayButton component communicates payment outcomes through the GooglePayButtonResult sealed class, which represents three possible states:
fun handlePaymentResult(result: GooglePayButtonResult) {
    when (result) {
        is GooglePayButtonResult.Success -> {
            // Transaction complete.
            // Access details via result.status (amount, orderId, timestamp)
            Log.d("Payment", "Order ID: ${result.status?.orderId}")
        }
        is GooglePayButtonResult.Error -> {
            // Payment failed or technical error
            Log.e("Payment", "Error: ${result.errorMessage}")
        }
        is GooglePayButtonResult.Cancelled -> {
            // User closed the Google Pay dialog without paying
        }
    }
}
Testing and Validation
Testing in Sandbox Environment
For development and testing, use PBLEnvironment.SANDBOX:
environment = PBLEnvironment.SANDBOXTesting with Physical Devices
To test Google Pay on a physical device:
- Ensure device runs Android 9 or newer
- Verify device is in a Google Pay-supported region
- Add a test card to Google Wallet (use Google's test card suite)
- Log in with your Google Account
- Test payments in Sandbox environment before going live
Going Live with Google Pay
Production Environment Setup
When transitioning from Sandbox to Production:
- Update Environment Configuration
environment = PBLEnvironment.PRODUCTION- Use Production API Keys: Ensure your backend uses live mode API keys
- Request Production Access with Google:
- Submit your app for Google Pay production access review
- Choose Gateway as the integration type
- Provide screenshots of your implementation
- Wait for approval from Google
- Test in Production Mode:
- Use a signed, release build of your app
- Test transactions with a real payment method.