Shopify

🛠️How to Install the payabl. checkout App for Shopify
- Login to your Shopify store dashboard.
- Open this link to download the payabl. checkout app (or copy this link to your browser search bar: https://apps.shopify.com/payabl-checkout).
- On the payabl. checkout app store page, click Install.
- You will be redirected back to your Shopify dashboard, where you’ll see the app listed under the installed apps.
- Click on the payabl-checkout entry to edit the settings.
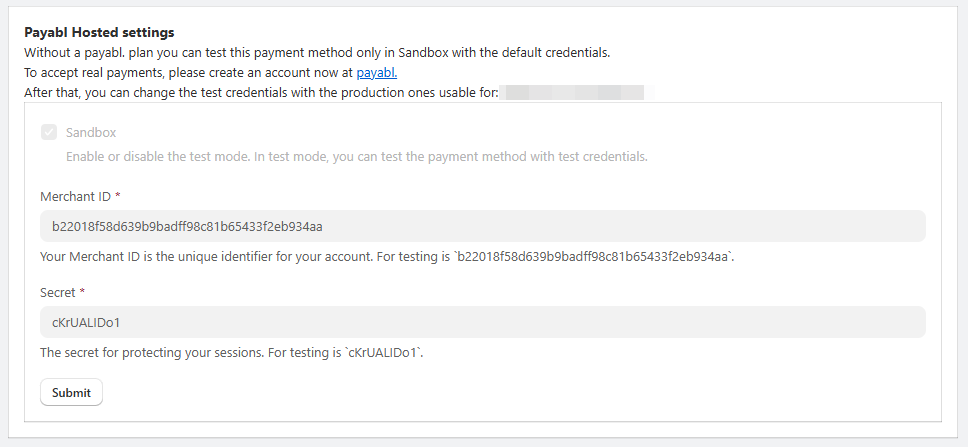
- You will see the test merchant credentials prefilled.
- Click Submit to save the settings.
- Click Return to Shopify , then on the new screen scroll down and click Activate.
- You can now test the app using our test environment (Check the “Test the payabl. checkout App for Shopify” section below).
How to Make Sure the App Is Installed and ActivatedPlease note that it may take up to 10 minutes for the new app to appear in your Shopify store’s Payments section.
If you still don’t see the payabl. Checkout app after that time, follow these steps:
Make sure the app is installed
- Go to Settings → Apps and sales channels and confirm that payabl. checkout appears in the list.
- If it isn’t listed, reinstall the app by opening this link.
Add payabl. checkout as a payment method
- Go to Settings → Payments and click Add payment method.
- Click Search by provider and type payabl. in the search bar - payabl. Checkout will appear.
- Select payabl. checkout and click on its card.
- On the next screen, scroll down and click Activate.
- payabl. checkout will now appear on your Payments page.
✅ How to enable the payabl. checkout app to accept real payments
If you already have a payabl. merchant account, please contact our support team at [email protected] to enable it for use with our Shopify app.
If you don’t have a merchant account yet, please complete the merchant form and our team will contact you to help set it up.
Once you receive your Merchant Credentials, follow these steps:
- Log in to your Shopify store dashboard.
- Click Apps in the Shopify menu.
- A list of your installed apps will appear.
- Select the payabl. checkout app to access the app settings.
- Disable Sandbox Mode by unchecking the box.
- Enter your Merchant ID and Secret.
- Click Submit.
If Sandbox Mode remains disabled or you encounter any issues, please contact our support team at [email protected].
🧪Test the payabl. checkout App for Shopify
Preview in Our Demo Shop
Preview the checkout flow in our Demo Shop by adding this password “skildu”.
Test on Your Own Store
- Install the app following the steps described above.
- Test all payment methods using the test credentials:
💳 Supported payment methods
Currently, the payabl. Checkout app supports the following payment methods:
- Credit Cards
- Instant Bank Transfer
- Google Pay™
- Apple Pay
- Trustly
- EPS
- Przelewy24
- iDEAL
Coming soon:
- Wero
- PayPal
Our Technical Support team is there to help you:
Email: [email protected]
Available: Monday – Friday between 09:00 and 17:00 CET/CEST
Updated 8 months ago