Apple Pay
Apple Pay lets customers pay in one tap with cards stored in their Apple Wallet, authenticated with Face ID or Touch ID — no manual card entry. The SDK provides a native Apple Pay button that handles the payment sheet and result handling for you.
| Order Page | Apple Payment sheet |
|---|---|
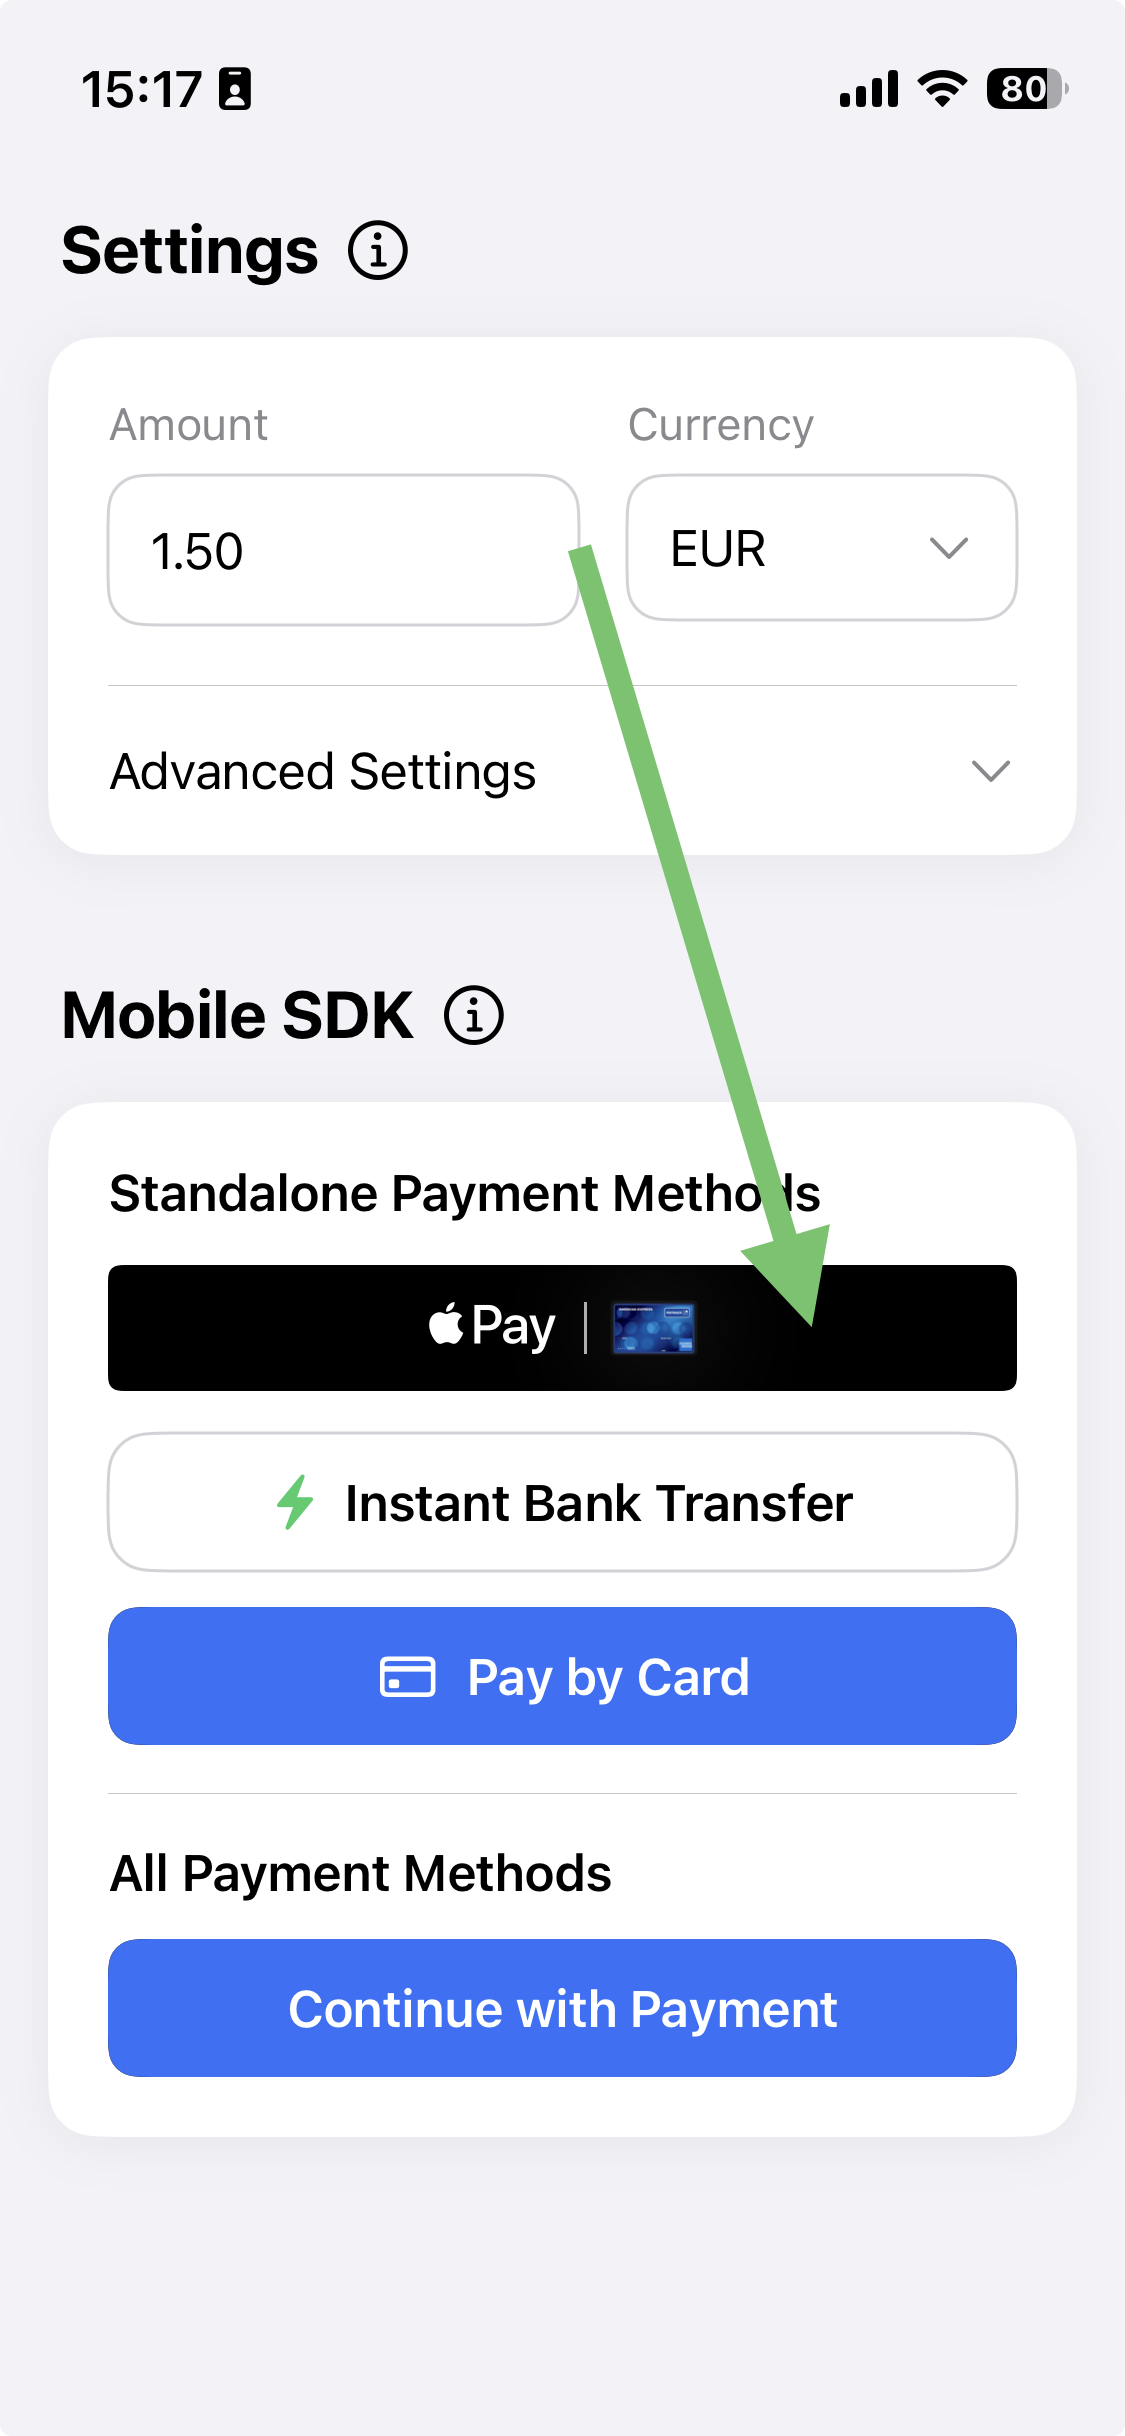 | 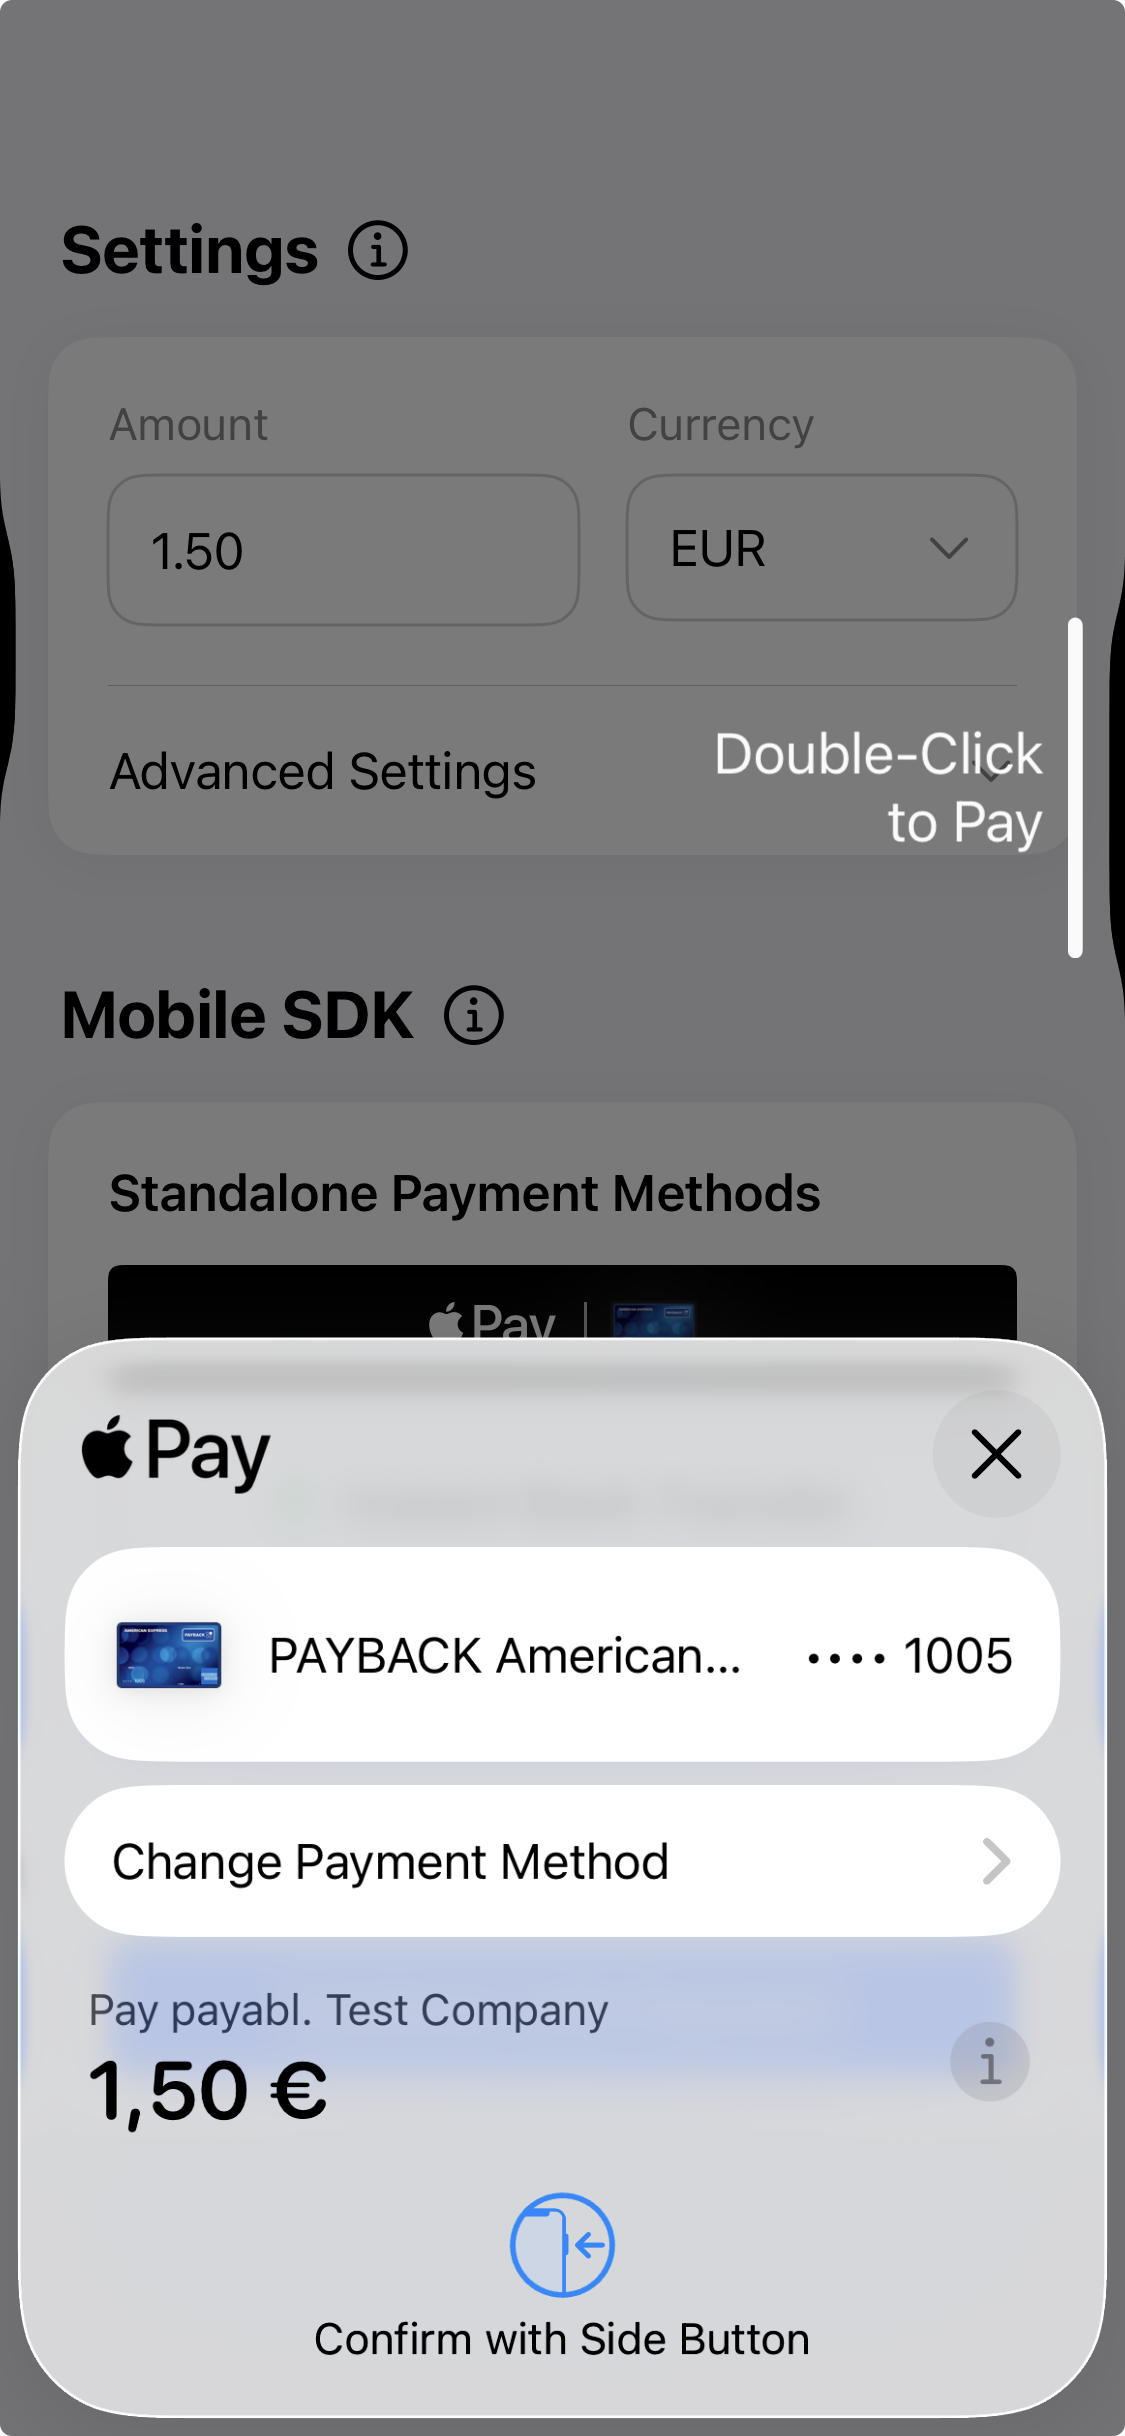 |
Flow: user taps the Apple Pay button → Apple Pay sheet opens → user confirms with Face ID / Touch ID → result is returned via PBLPaymentResult.
Prerequisites
payabl. requirements
- The SDK is added to your project — see iOS SDK.
- Your backend can create a session via
/mobile/init, and the request must include thecountryparameter for Apple Pay sessions — see Setup Your Server.
Apple Pay certificate exchange
To decrypt Apple Pay tokens, payabl. and your Apple Developer account must complete a certificate exchange. Repeat these steps separately for sandbox and production — you will need two CSR files and two Apple Merchant IDs in total.
- Request a CSR: contact [email protected] to generate a Certificate Signing Request (CSR) file.
- Create an Apple Merchant ID in your Apple Developer account under Identifiers → Merchant IDs.
- Sign the CSR: upload the CSR to your Apple Merchant ID. Apple issues a Payment Processing Certificate.
- Send both back: provide the Apple Merchant ID and the issued certificate to [email protected] so we can configure it in our system.
- Configure Xcode: enable the Apple Pay capability in Signing & Capabilities and select your Apple Merchant ID. Use the same ID to initialize the SDK (
appleMerchantIdinPBLConfiguration).
Device and account setup (for testing)
- A device signed in with a sandbox tester Apple ID and a test card in Apple Wallet — see Apple Pay sandbox testing.
Integration
The SDK drives the payment flow through delegates. Your view model adopts:
PBLApplePayTapDelegate— provides the session configuration when the user taps the button, and receives the payment result.PBLErrorDelegate— receives SDK errors raised outside the payment result.
1. Fetch session configuration
Request a session from your backend and build a PBLConfiguration. Create a new session for every payment attempt. The appleMerchantId must match the Merchant ID from the certificate exchange and your Xcode capability.
import SwiftUI
import PayablMerchant
import Combine
import PassKit

class DemoCartViewModel: ObservableObject {
    var pblApplePay: PBLApplePay?
    @Published var pblApplePayLoaded: Bool = false
    var configuration: PBLConfiguration?

    // In your server, this endpoint should call the /mobile/init API
    let backendCheckoutUrl = URL(string: "backend_endpoint/payment_page")!

    func prepareOrder() async -> PBLConfiguration? {
        var request = URLRequest(url: backendCheckoutUrl)
        request.httpMethod = "POST"

        await withCheckedContinuation { continuation in
            let task = URLSession.shared.dataTask(with: request) { [weak self] data, response, error in
                guard let data = data,
                      let json = try? JSONSerialization.jsonObject(with: data) as? [String: Any]
                else { return }

                let sessionId = json["sessionId"] as! String
                let ephemeralKey = json["empheralKey"] as! String
                let transactionId = json["transactionId"] as! Int

                self?.configuration = PBLConfiguration(
                    sessionId: sessionId,
                    ephemeralKey: ephemeralKey,
                    customerId: "", // not used for Apple Pay
                    environment: .sandbox, // use .production when going live
                    transactionId: transactionId,
                    appleMerchantId: "merchant.payabl.isdk" // your Apple Merchant ID
                )
                continuation.resume()
            }
            task.resume()
        }
        return configuration
    }
}
2. Adopt the delegates
extension DemoCartViewModel: PBLApplePayTapDelegate {
    // Called when the user taps the button — load the session, then hand the config back to the SDK
    func applePayTapped(onLoadSessionCompleted: @escaping (PBLConfiguration) -> Void) {
        Task {
            guard let config = await prepareOrder() else { return }
            onLoadSessionCompleted(config)
        }
    }

    // Called with the final result of the payment
    func applePayCompleted(result: PBLPaymentResult) {
        handlePaymentResult(result)
    }
}

extension DemoCartViewModel: PBLErrorDelegate {
    func errorOccured(error: any Error) {
        // Handle SDK errors (e.g., configuration or session issues)
        print("error from sdk: ", error)
    }
}
3. Add the button
Create the PBLApplePay component with your chosen button style and place its button in your view.
struct ContentView: View {
    let cartVM = DemoCartViewModel()

    var body: some View {
        VStack {
            if cartVM.pblApplePayLoaded {
                cartVM.pblApplePay?.button
                    .frame(maxWidth: .infinity)
            }
        }
        .padding()
        .onAppear {
            cartVM.pblApplePay = PBLApplePay(style: .whiteOutline, delegate: cartVM, errorDelegate: cartVM)
            cartVM.pblApplePayLoaded = true
        }
    }
}
Button styles — all natively supported Apple Pay button styles are available:
| Style | Appearance |
|---|---|
.white | White button with black lettering |
.whiteOutline | White button with black lettering and a black outline |
.black | Black button with white lettering |
.automatic | Adapts automatically to Light Mode / Dark Mode |
Follow Apple's Human Interface Guidelines for Apple Pay for button placement and sizing — Apple reviews this during App Review.
4. Handle the result
applePayCompleted returns a PBLPaymentResult. Handle all three cases.
func handlePaymentResult(result: PBLPaymentResult) {
    switch result {
    case .completed:
        // Payment successful — update order status
        break
    case .canceled:
        // User dismissed the Apple Pay sheet
        break
    case .failed:
        // Payment failed — inspect the result for the error code
        break
    }
}
Testing
Use the sandbox environment (.sandbox) with your sandbox Apple Merchant ID. Set up a sandbox tester Apple ID and add Apple's test cards to Wallet following Apple Pay sandbox testing.
For test data across all payment methods, see Testing.
Common issues
| Issue | Cause & resolution |
|---|---|
| Apple Pay button doesn't appear | Apple Pay capability not enabled in Xcode, no Merchant ID selected, or no card available in Wallet on the device. |
| Sheet opens but payment fails | Certificate exchange incomplete for this environment, appleMerchantId doesn't match the configured Merchant ID, or country missing from /mobile/init. See Setup Your Server. |
| Works in sandbox, fails in production | Production certificate exchange not completed — sandbox and production require separate CSRs and Merchant IDs. |
| Payment fails after some months in production | Payment Processing Certificates expire — renew via a fresh certificate exchange before expiry. |
When something goes wrong, see Error Handling & Troubleshooting.
Updated 20 days ago